Odds and ends for my 365 friends
Swiss Carrot Cake (with Canadian Twist)

Schwiizer Rüebliturtä
200 g carrots, grated
1 Apple, without peel, grated
300 g ground almonds or hazelnuts (hazelnuts would be classic, but I use almonds)
100 g flour
1 tsp baking powder
4 eggs, separated
3/4 cup maple syrup (or 1 cup of sugar and only 75 g flower)
1 shot kirsch
24 cm springform pan and baking paper
- Preheat the oven to 180C / 350F.
- Mix the almonds, flour, baking powder.
- In an extra bowl, whisk together the 4 egg yolks and sugar/maple syrup until you get a pale, yellow paste. Add the shot of kirsch and whisk well.
- In another large bowl, whisk the 4 egg whites until stiff. You know how the test works. 😉
- Mix the grated carrots/apple into the yolk and sugar paste, then fold in the dry ingredients. Finally, gently add in the beaten egg whites
- Line the pan with baking paper, this cake is moist and can be very sticky.
- Spread all into the pan.
- Bake for 55-60 minutes.
- After baking and when cooled down, dust it with powdered sugar and add some marzipan carrots. (Mix white marzipan with one drop of yellow and one drop of red food colouring, knead well and form
carrots. If not available in the stores.)
Hope you will love it.
Cheers Mona
Little tutorial how I do my "rainbow coloured shots"


Karly @365karly1 and Carole @yorkshirekiwi asked for a little lesson how I do my "rainbow coloured shots". As I'm always highly inspired by all the 365 friends and I learned a lot on this project, I am more then glad to share some of my experiences to help others to find solutions and improve in photography. Of course every picture has its unique grow and evolutionary history and more often than not, I’m not able to accomplish the picture I have in mind. Telling me, that you always have to be in the learning process and the mind-set has to be flexible. Often there are different ways to get a result and it is fun to find its way. So every picture I do for the rainbow month is different achieved and I use a million of diffrent things to achieve the bokeh.
I take this turquoise picture as example, as I could easily rebuild the set-up. Only that I did shot the original at night time, without any natural light.
Set-up: Most of my “still life” kind of shots, have an easy set up, in the kitchen (cold light) from the under cupboard lights or on the eating table, natural light from the right and a warm coloured lamp on top. This one for turquoise I did in the kitchen. On the picture above you can see what I needed for the shot. Like: The hole saw thingy, two halogen lamps, light blue paper as base, glitter paper as backdrop and some material that adds more bokeh.
To increase the likelihood of visible bokeh in your photographs, increase the distance between your subject and the background. You can do this by decreasing the distance between the camera and subject. The more shallow the depth-of-field, or further the background is, the more out-of-focus it will be.
Anything that reflects light, adds a bokeh. Highlights hitting the background will show more visible bokeh too, so if you’re using a light like I did, the bokeh may be more pleasing to the eye.
Lens: You’ll need to shoot with the lens wide open, so you’ll want to use a shooting mode of aperture priority or as I do in manual mode. Manual gives you the ability to choose both your aperture and shutter speed. I shot this picture with a lens at an f/2.8 aperture. If you have a faster lens with apertures of f/2, f/1.8 or f/1.4 you are lucky, and the result will be even better. But I have no lens with these possibilities. Don't worry if you don't own a very fast lens. By increasing the distance between the background and your subject, you can see bokeh in images that are shot at smaller apertures.
Light: I coloured the light with two different transparent file folders. One in green and one in blue, to achieve a turquoise tone, all over the set-up.
Exif:
Shutter speed: 1/15 s
Aperture: 2.8
ISO: 100
White Balance: Manual (cold light)
Lens: 90 mm Macro

Post-processing: This picture is a bit special, as I combined two pictures. Those two you see above. One, where the hole saw is totally out of focus and one, with focus on the saw rings. I did this, because I liked the regularity of the bokeh on the saw.
Different post processing steps / short version:
Photoshop Elements18 & ACDSEE Photo Studio Pro 2018:
Perspective Correction
Combination of the two different layers
Cleaning away the dust
Exposure: lighten mid tones in the middle of the picture. Overall correction.
White balance (whites)
Colour: Adjust sliders until I reached the tone I wanted for the project.
Selective and partially Gaussian blur, in different layers and different intensity.
Adding signature
Upload to 365 project:
2.
Processing in Picmonkey
Adding Corniture in Themes/Winterland and cleaning the layer it at places I did not want it
That’s it. I hope this helps, please get in touch with me, if I'm not clear or if you have questions.
Kind regards
Mona
Result / Final picture

Pizzoccheri Recipe
2017-11-04

Pizzoccheri are buckwheat noodles cooked with potatoes and cabbage and smothered in a garlic – sage butter and coated with the delicious mountain cheese. This is a recipe that is my little variation of Puschlaver Pizzoccheri.
Serves 4
Because this pasta is made with buckwheat flour and originally has no eggs, it is a little tricky. But don’t be discouraged if the noodles break. This is a rustic dish and the noodles are not meant to be perfect.
For the pasta
- 100 g buckwheat flour
- 75 g flour
- 1/2 cup water
- 1 spoon extra virgin olive oil
- You can add an egg, then it is easier and the dough get’s smoother. Just use less water.
To finish
- 1 small green (savoy) cabbage
- 2 medium potatoes, cut into cubes
- 75g butter
- 1 garlic clove
- 10 fresh sage leaves
- 100 g grated cheese (please use a good one. I use a ripe, hard mountain cheese like Gruyere. Originally Casera cheese is used.)
- Salt and freshly ground black pepper
For the pasta
-
Mix the pasta ingredients together and knead for 5 minutes until you have a firm dough. Cover with a cloth and let rest for one
hour before rolling out the pasta thinly with a rolling pin. Use plenty of flour on your table and the pin, so it does not stick.
- Cut into tagliatelle noodles about 1 cm wide, then cut each noodle crosswise into pieces ca. 6 cm long.
To finish
- Before you start cooking, place a large serving bowl in the oven to warm.
- Bring a large pot of salted water to boil.
- Add the potatoes to the boiling water and cook them for about 2 minutes.
- Shred the cabbage.
- Add the pasta and the cabbage, let the water return to a boil and cook for another 3 minutes.
- While the pasta cooks, melt the butter over moderately high heat and sauté the garlic for about 2 minutes, don’t let it colour.
- Add the sage leaves and remove from the heat.
- Drain the pasta and vegetables and turn into the serving bowl.
- Remove the garlic from the butter, add the seasoned butter, stir well and then add the cheese.
- Stir. The cheese will melt into the hot pasta and vegetables.
- Season with salt and pepper and serve immediately.
Notes
- If you don’t want to make the pasta by yourself, look for dried pizzoccheri noodles in a specialty Italian shop, or use plain dried pasta. Choose a wide noodle such as pappardelle or tagliatelle.
- If you are using store-bought pasta, cook according to package directions. The potatoes need about 8 minutes to cook, the cabbage about 2, so add the pasta accordingly.
Enjoy!
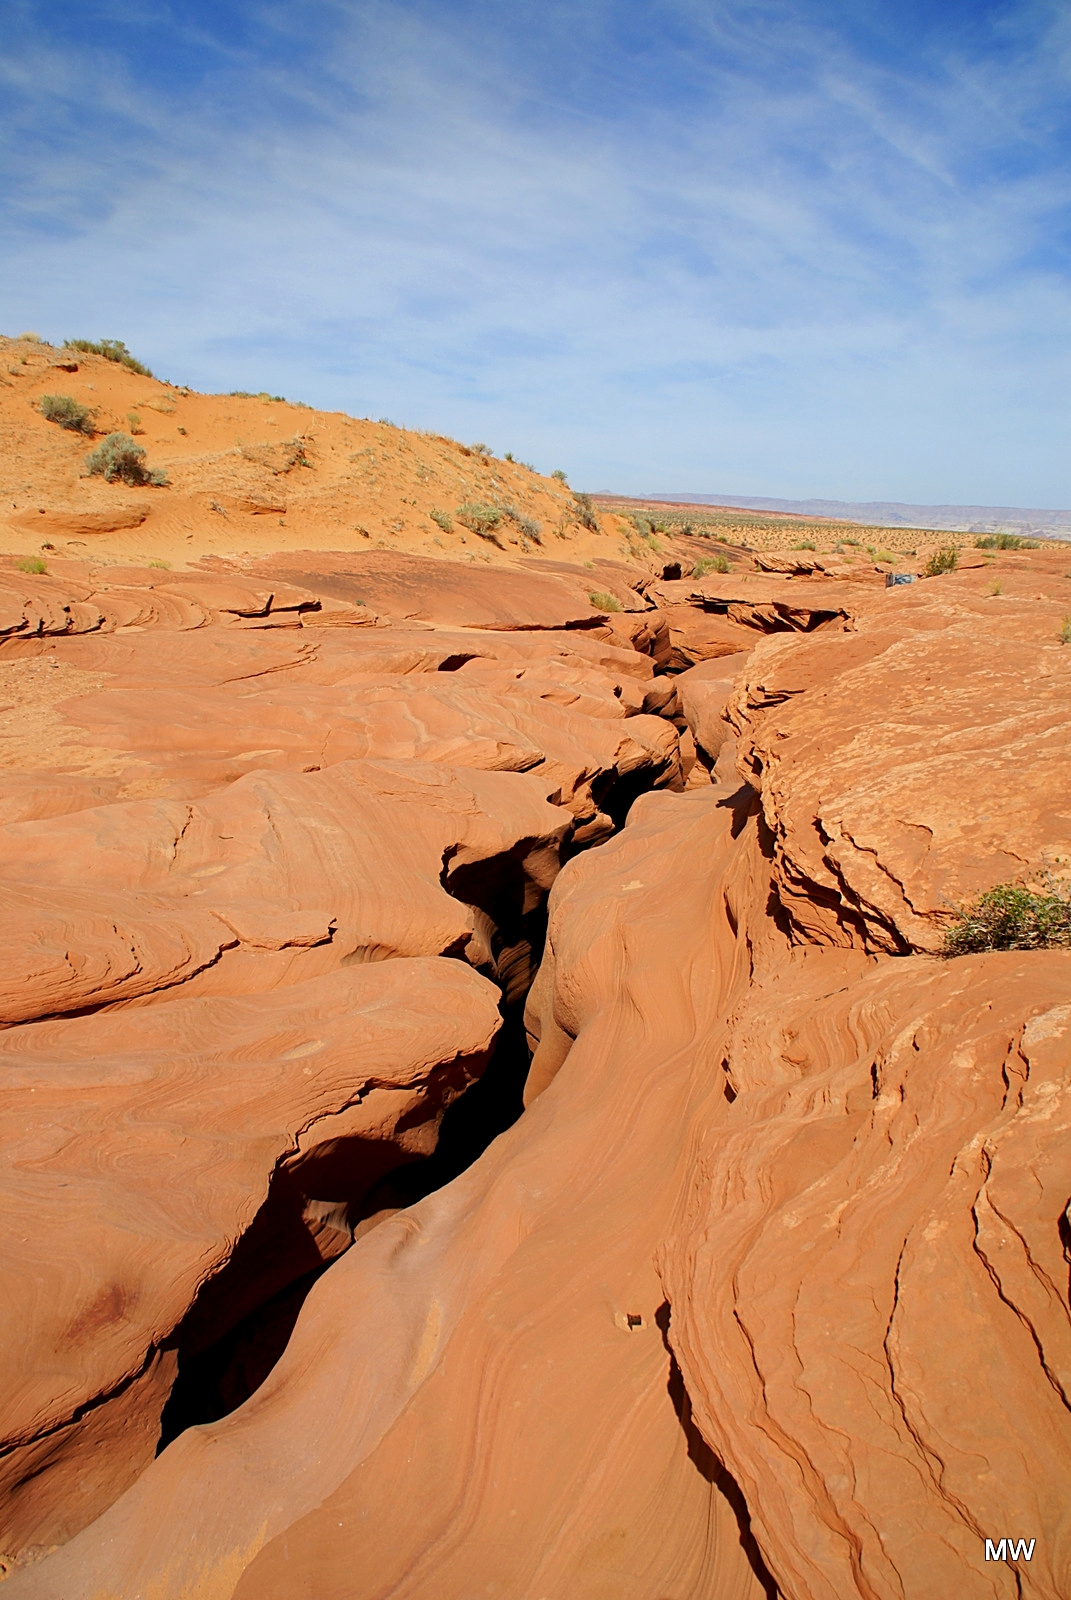
Lower Antilope Canyon -
2017-03-27
I personally liked the lower antilope canyon better, as we had plenty of time and total quitness to admire and photograph this magic place. For me the chattering of people can really
destroy such a once in a lifetime experience. BTW, this is on of my top ten travel experiences I ever had. Only topped by animal encounters, like snorkeling with whale sharks, seeing humback
whales breach or a fight between wolf and blackbear in Alaska,...
Only thing I would have liked to know before entering the slot, ...how to cope with "white balance" or you shoot RAW. For not fumbling with it, down there in the slot. And yes, a tripod is a
must.


- Es sind noch keine Einträge vorhanden.

Mona Style Rhubarb Cake / Rhabarber Kuchen
2016-05-13

(for conversion see link above)
You need for a springform pan (diameter 20 cm)
75 g butter
175 g crude or white sugar
1 pinch
salt
3 eggs
1
zests of an untreated lemon
100 ml cream
150 g grounded almonds
200 g flour
1 teaspoon baking
powder
8-10
stalks fresh rhubarb
How it's done (very easy):
1. Using vegetable peeler, slice some of the rhubarb long-ways. You need about 24 nice slices, all a bit longer then the diameter of your springform pan.
2. Ad a tiny amount of water in a pot and bring to a boil. Reduce to simmer, and add the slices of rhubarb. Cook (blanch) just for a short time (1 minute or so), so they are slightly softened. Then drain on paper towels and put them aside.
3. Chop the rest of the rhubarb in tiny chunks.
4. Beat butter till creamy, add sugar, salt, eggs and lemon zests and beat till the whole mass becomes lighter in colour. Add cream.
5. Mix almonds, flour and baking powder in a bowl and add the egg mass. Pour in the
buttered springform pan. Now you add the rhubarb chunks (if you do it this way not all of them will sink on the ground of the mass, and you will not have sticky mass on your slices while waving
the topping) and smooth the surface.
To make the Rhubarb Lattice Topping:
6. Line up slices of cooked rhubarb side-by-side on top of the cake. Fold alternating slices up, and place perpendicular slices over, in a lattice pattern. Repeat until you covered the entire top of the tart.
Cut off the overhanging pieces.
Back for about 45-55 minutes at 180°C
Enjoy!
Cinnamon Stars Recipe / Zimt Sterne Rezept
2015-12-18
You need for one baking sheet / tray (our size)
3 fresh egg whites (about 90g / 3.17oz)
1 pinch of salt
250g/8.8oz powder (icing) sugar
1.5 tablespoon ground cinnamon
350g/12.32oz ground almonds
Secret ingredients (only for my 365 friends, you can do without that):
1 teaspoon cacao powder
some lemon zests, not a lot
grated fresh ginger (little tiny bit)
0.5 tablespoon Kirsch (or fresh lemon juice)
How it's done:
1. Whip egg whites with the salt until stiff
2. Add the powdered sugar (I always sift the sugar, so you will not have lumps (or what ever you call these in english)
3. Remove 6 tablespoons of this mixture for the glace and put it covered in the refrigerator.
4. Mix cinnamon powder, almonds, and the rest of the ingredients in the remaining egg white mass to form a dough.
To form:
Roll out dough portions about 1 cm thick on little sugar (no flour!), or between a plastic bag. Cut out stars of the size about 3-4 cm, place the molds/cutters repeatedly in sugar to prevent sticking. Place the stars on a tray which is lined with baking paper.
Glazing:
Place a little icing in the center of the stars and pull with a wooden skewer into the tips.
Drying:
Dry at room temperature for about 6 hours or overnight.
Baking:
Baking for 5-7 minutes at 200°C (392°F). They are done, when the outer tips of the stars will be light brown, but the cookie is still soft in the center. Remove and cool on wire racks. As they do not contain flour, they don’t take long.
You can keep them in an air proof container for 2-3 weeks. Add an apple and the soften again, if they are hard.
At our place you get the first Christmas cookies at Christmas Eve (24.12. evening), what is the date we celebrate Christmas.
Enjoy!
Mona W (Sonntag, 11 März 2018 19:03)
Please leave a comment, if you have any suggestions or questions.